When Apple announced iOS 13 at WWDC, a lot of users reported a problem around it, especially around data loss. While software upgrades offer a lot of new features, they come with their own set of problems. So if you upgraded to iOS 13, and you are facing data loss problem, then you can use iMobie PhoneRescue software to recover the lost data. In this review, we will share how you can use this professional recovery software.
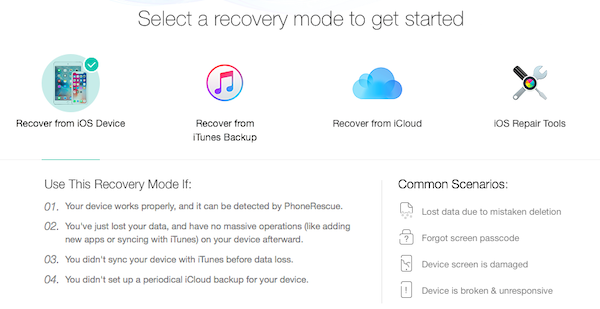
Use PhoneRescue to resolve data loss problem
PhoneRescue is a powerful professional iPhone data recovery software which offers recovery of 31 different types of data, including photos, videos, contacts, iMessages, etc.
Once you install the software and launch it, it will offer you three recovery modes–
- Recover from iOS Device,
- Recover from iTunes Backup,
- Recover from iCloud.
There is an additional option – iOS Repair Tools. You can use it when there is an iOS upgrade failure, iPhone is stuck on the Apple logo, the device is unable to start, or the device is in recovery mode. That said, let’s talk about how you can use each of these modes.
Recover from iOS device
If you have just upgraded to iOS 13, and you are not able to find your data on the phone, then this is the right mode to use to recover data. You will also have to make sure you haven’t done any major file operations, including app deletion, new app installs, and so on.
Launch the software, and then connect the device to your computer. Select this mode and wait for the software to detect your iPhone. Once it detects, click on the arrow button to go to the next step.
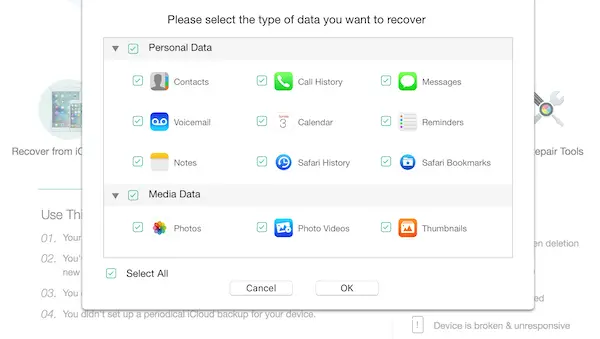
It will open a pop-up window where you can select the type of data you want to recover. If you have deleted a photo or uninstalled an app or delete a contact, then choose accordingly. Click on ok to start the scanning process. Depending on the amount of data on your iPhone and the selected options, it can take a few minutes to a few hours. In case you need to leave for some work, you can always abort.
Let say, you have deleted a recent call log, and you need to call the person. It’s a good use case because if you do not have any other way to figure out, it can help. Once the scanning is complete, the result will show both lost and existing data, but you can filter to using the “Only list deleted” option.
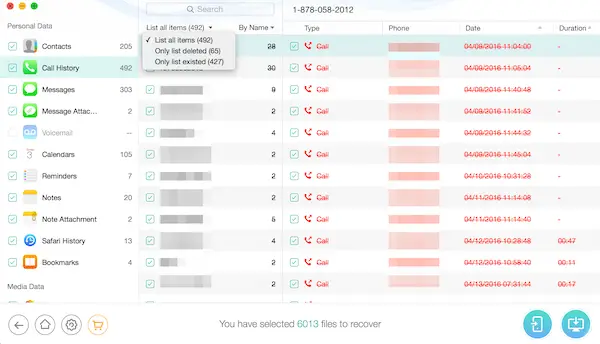
The result page offers a search box which you can use to filter out data based on what you remember. If there are too many records, this option is handy.
Once you find what you want to recover, select the checkbox against the listed item, and click on the phone icon at the bottom right. It will send all that data to your phone and recover it. The software also offers an option where you can save the data on your computer. You can click on the computer icon to do so.
Recover from iTunes Backup
iTunes always keeps a backup of all your data on the iPhone. If you have synced at least once, it is possible to restore all data. iTunes could be used to get back to the same working condition if you had to reset your iPhone. However, in case you have deleted some files, etc., it will not bring back that data to your phone. In that scenario, it will remove the file from the backup as well.
PhoenResuce, on the other hand, can get the file or data from the iTunes backup. It can compare the data in iTunes and your iPhone and figure out what is missing on the phone, and bring that data back.
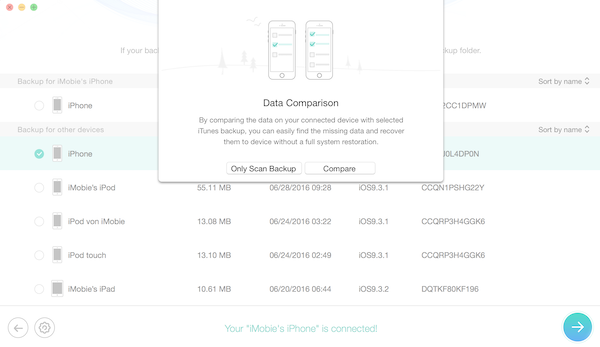
You should use this method if you want to recover Personal data, Media Data, and App data. Once you connect the device and choose this option followed by a scan, the software will display all backups available with iTunes. Select one of the back-ups, and you have two options. The first option scans all the data and displays as is, and the second option compares and tells what you what is missing on the phone.
Select the checkbox next to the item you want to recover, and then choose to sync back to the phone. You also have the option to download the deleted item to your computer if that works.
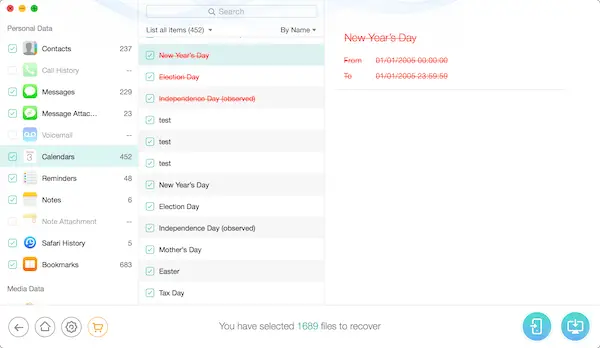
Just like the first method, you can select what type of data to scan in the backup and search by name.
If the backup of your iTunes is password-protected, the software does offer a solution to crack the password. However, it’s limited. As of now, PhoneRescue supports four types of password, including Uppercase Letters, Lowercase Letters, Numbers, and Special Characters. If you forget the kind of your original password, choose more types, like Numbers+Letters or Numbers+Special Characters.
Recover from iCloud.
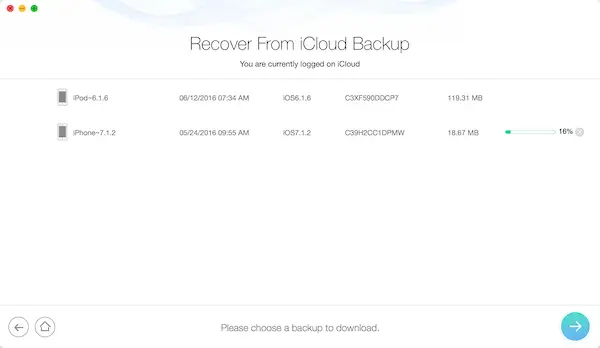
The third option is to look into your iCloud. Using iTunes can be a bit risky. If it starts syncing as soon as you connect it, then all will be lost. That’s is where iCloud comes into the picture. The software can connect with your iCloud account and then download the backup. However, make sure to turn off two-step verification as Apple restricts this type of login where a third party tool is used.
On iCloud, the recovery software will detect all contacts, notes, videos, etc. you synced to iCloud. It will also offer more types of data which you can recover. Make your choice accordingly. Once the download is complete, click on the Next button, and it will display a similar screen as we saw in the iTunes section.
You can choose between”Only Scan Backup” or “Compare” option. Post this; you can figure out all the deleted data on your iPhone, and download or recover files.
Overall it’s an excellent software which can help you recover lost data. You can download the free trial version of PhoneRescue by following the link.
Note: Have you upgraded to iOS 13? Let us know by contributing to the poll here.
PhoneRescue - Free Download
-
Recovery Quality - 88%
88%
-
Functionality & UI - 88%
88%
-
Data & privacy - 88%
88%
-
Photo Recovery - 88%
88%
-
Time for Recovery - 95%
95%