If you are into vlogging or any video making profession, you might already be using some video editor for sure. But, if you have landed on this post, that means you are still in search of a better video editor and trust us when we say that you have landed at the right place.
In this post, we will review the AVS Video Editor which is one of the most popular video editors among the Windows users. The USP of this software is its ease of use. Unlike the other complex video editors, AVS Video Editor is a simple program best suitable for both beginners as well as professional users. It comes with a very simple interface with all the options, controls and features available on the main overview.
Though the software provides a library of video tutorials to use AVS, you won’t really need them. It is that easy and simple. The software lets you edit your raw footage and convert it into a finished video suitable to upload on the internet.
AVS Video Editor review
AVS Video Editor is an ideal program for both expert users and beginners. This video editing program is designed for making awesome high-quality videos. Its key features in a nutshell are:
- Create impressive videos and slideshows with music, 300+ effects, tex, overlays.
- Edit video in all key formats, incl. Full HD and 4K Ultra HD.
- Improve original video with color correction tools.
- Stabilize video camera shaky recordings
- Record video from DV/HDV cameras, webcams or VHS cameras.
Let us review the software in detail.
User-Friendly Interface
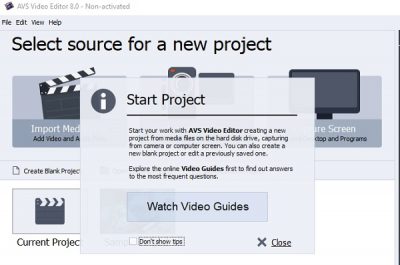
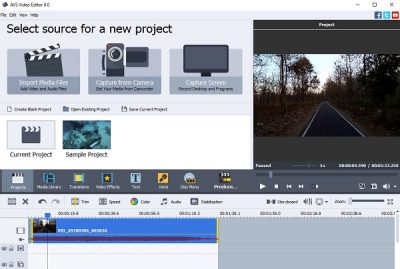
Once you have downloaded & installed the software, you will find that its main interface brings all options and tools handy. Right from importing the video, adding effects, adding audio, text or transitions, everything is easily accessible. Thus AVS is considered as the best software for the beginners and learners. You will get the learners guide and tutorials when you first launch the program. These guides and tutorial will help you learn the program quickly.
Import Video and Add it to Timeline
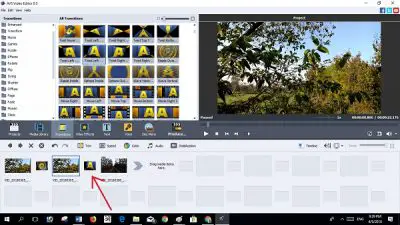
You can import the video or any media file stored on your PC or can transfer it right from your camcorder. Click on Import Media Files and import a video, drag and put it on the timeline to edit. The timeline displays each element of the video in details to help you in editing.
There are different editing timelines for everything in AVS. The top line is for the video clip, followed by the line for video effects, then video overlays, text, music files, and then voice recording. You have to put each file on its respective line only to edit. 
You can have the music playing the background even when you are talking. So add the music files and voice recording files in their respecting lines only.
With the detailed timeline, you can make even the granular changes easily and with more accuracy. The timeline and storyboard are both very much simplified. You can trim a selected part of the video, increase or decrease the speed of your video, add colors to the video, stabilize it and much more. If you want to view the project timeline in detail, you can also zoom in the storyboard. We need a good zoomed in storyboard when we want to split or edit the audio in the video. 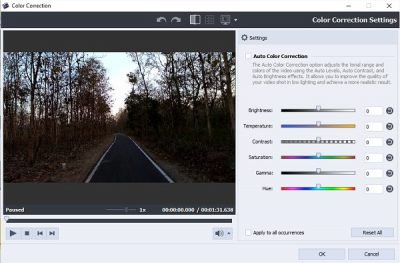
Add Transitions and Video Effects
A good compilation of transitions, effects, overlays is something very important to make a video editor professional. AVS Video Editor comes with more than 600 transitions and effects which will help you edit the video with precision. You can add as many effects, voice tracks, effects and overlays as you want. Though it provides a single video editing track which somehow limits the versatility of the program. 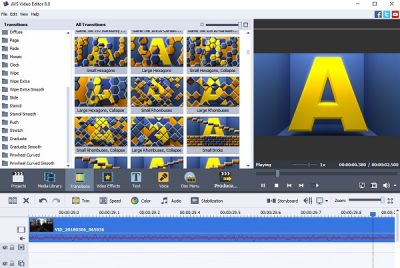
Adding the effects and transitions in AVS Video editor is quite simple. Open the video files in the storyboard, select the desired transition of video effect and drag them to the arrow in between your video clips. You can use different transition and video effect in different clips or same transition in all of them. AVS provides hundreds of different transitions, make sure you check them all and then select the best one.
Furthermore, AVS also brings hundreds of video effects too which you can add to every clip and make your video even better. The video effects library include the basic snow, blur, sharpen effects as well as the transforming effects of flip, twist, etc. It is suggested to try a few effects from the library before you finalize one. After you are done with adding the transitions and video effects, take your project back into the timeline mode. While the transitions and video effects are set to the default duration of 10 seconds, you can change it anytime according to your own preferences.
Add Text To Videos Using AVS Video Editor
Click on Text button on the menu ribbon, and you can add the desired text to your video. Unlike the other basic video editors, AVS video editor lets you add text in a different format and with different effects making your video look even more professional and interesting. Just select the text effect and drag it to the timeline meant for the text, i.e., the fourth line. Just like the transition and video effects, you can adjust the duration of text too. All you need to do is to right-click on the text effect, adjust the duration and click on OK. 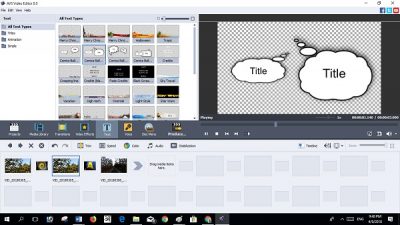
Adjust your Audio and Video Stabilization
No one likes the shaky videos or the videos with bad audio, so if you want your video to look professional, make sure that you stabilize it well and add the audio files match the video files correctly. AVS lets you equalize the sound and remove the background noise giving you perfect audio, be it a music file or a voice recording.
To adjust your audio, you need to right-click on the audio clip, select Audio. It will open a new pop-up window of audio correction where you can make the required changes. 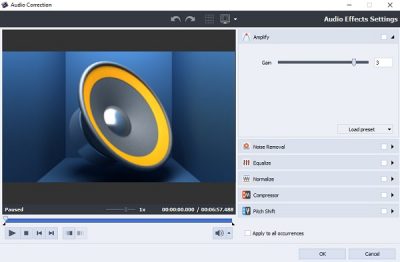
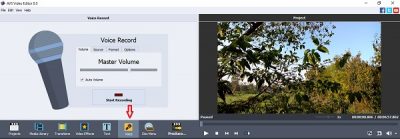
Adding the voice recording is again equally easy with this editor. Click on the microphone icon in the menu ribbon, and it will open up the voice recorder. You can add a commentary to your video or any narration you want.
Now when you are done with all editing and adding effects etc., its time to save the video. Make sure you playback the video before you save it. Saving the video is also quite simple and straightforward here. You need to click on the Produce button in the menu ribbon. The program offers yo four option to save your video. 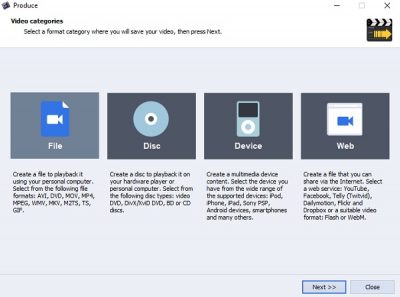
Click on Next and select your preferred file format to save the video. The default option here in this program is AVI file but you can select according to your own preferences. 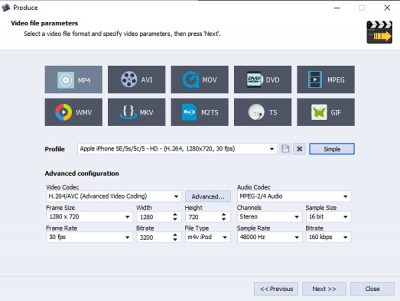 Select and click next. Select the desired folder and click on Create. You now have a wonderfully edited professional looking video to upload on the internet for the world to watch it.
If you are looking for a simple-to-use video editing software which comes with advanced features, this is just what you may be looking for. You can download it from its homepage.
AVS Video Editor - 47.20$
-
Installation Process - 90%
90%
-
Functionality & UI - 88%
88%
-
Video Editing Quality & Output - 90%
90%
-
Video Format Support - 90%
90%
-
Multi-format export - 90%
90%
Could you suggest a comparable program for Mac users?
Have a look at OpenShot Video Editor.
https://www.openshot.org/