If you work with PDF files often, you may encounter situations where you need quickly edit a PDF document, such as correcting a small error or adding a new section. This usually requires specialized PDF editing software. Luckily, in this article, we’ll share the top 5 PDF editors on the market, and the steps for editing a PDF file using each program.
Best PDF Editor software
1. PDFelement
is among the world’s leading PDF editing suites. It is enterprise-level software that is packed full of cutting-edge features and a range of PDF editing tools, including optical character recognition, and advanced PDF conversion tools.

PDFelement is basically the PDF Experience Simplified, thanks to its intuitive interface and easy-to-use dialogue boxes. Anyone familiar with programs like Microsoft Word or OS X Pages can easily learn to use PDFelement within minutes.
How to Edit a PDF file with PDFelement
I found that using PDFelement is surprisingly simple, even for beginners. You can start by visiting their website to download a free demo of PDFelement 7. Double click on the downloaded file and follow the instructions to install it. Meanwhile, you can get up to 50% off for a limited time if you decide to have it.
Launch PDFelement and then open the PDF file you’re looking to edit. You can do so by clicking on the Open File located on PDFelement’s launch screen. Alternatively, you can drag and drop your PDF file onto the PDFelement launch screen for the ultimate convenience.
Moving Text
- Click the Text button on the left-hand toolbar
- Click on the text you wish to move.
- Drag that portion of text to any location.
Useful Tip:
By default, PDFelement is in Paragraph Mode, which selects and edits paragraph-sized sections of text. You can change to Line Mode by clicking the Line Mode button on the right-hand side of the top toolbar. This allows you to move, delete, or edit individual lines of text instead of entire paragraphs, which I found to be more suitable, depending on the type of document I was working with. Overall, I found this function very useful and easy, since it was straightforward, and there weren’t too many steps involved.
Editing Text
- Double click the section of text you wish to edit.
- You can click anywhere inside the text area to move the position of the cursor. To add new text, simply start typing. You can also highlight text to modify it or delete text using the delete key.
- Use options in the top toolbar to change text formatting
- Once done with your edits, click outside of the text box and save your document.

This was an easy function to figure out and use. Once you figure out how to move your text, you already have the other text editing options in front of you in the top toolbar, so it is easy to navigate.
Adding text box
- Click the text (“T”) button on the left-hand side of the top toolbar.
- Click anywhere on your document to add a new text section.
- Once you have positioned your text box, start typing in your new content.
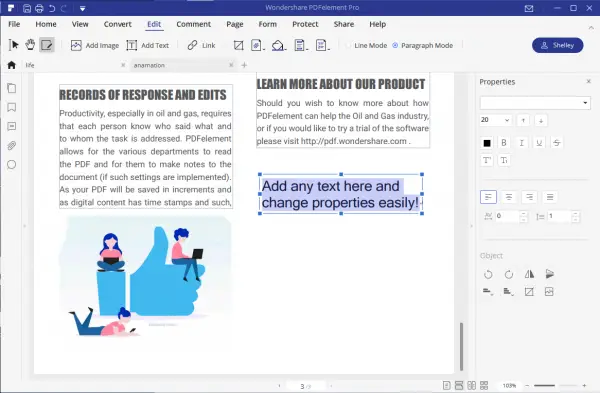
Again, this is just as easy as the other steps for modifying text. Once you learn one tool, the rest comes naturally.
Adding images
- Click on the Image button in the top left-hand toolbar.
- Select Add Imag
- Select an image and click on the area of your PDF document that you want to add it to.
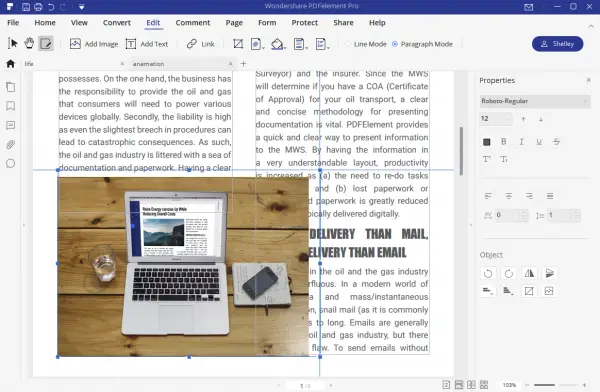
Again, this is a straightforward process, similar to using MS Word, and it should be simple for most users who have experience with that program.
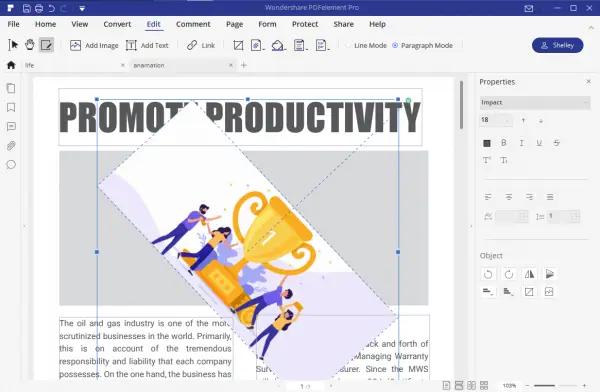
Moving, resizing, or rotating images
- Click on the Image button in the top left-hand toolbar.
- Hover your cursor over the middle of the image you want to modify.
- Drag the image to a new area by clicking on it and holding down your mouse. To resize an image, click on the image, then drag the blue squares on the edge of the image inwards or outwards, depending on how you want to re-size it.
- To rotate an image, click on the Rotate button on the top toolbar.
 Replacing and extracting images
- Select an image then click the Replace button on the top toolbar.
- Choose a new image and click Open.
- Your new image will automatically appear in the document.
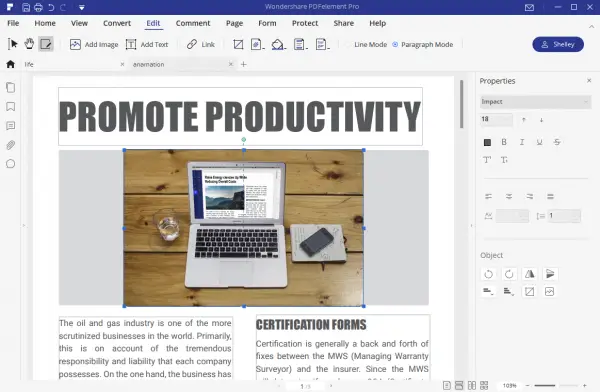
To extract an image from your document, click on it, and select Extract on the top toolbar. Choose a destination to save your image to and click Save. Working with images is very straightforward, and you can add or modify images effortlessly without having to spend a ton of time worrying about correct formatting.
Links, Forms, and Tools
- Select the text you wish to transform into a link.
- Click the Link button to add the link URL.
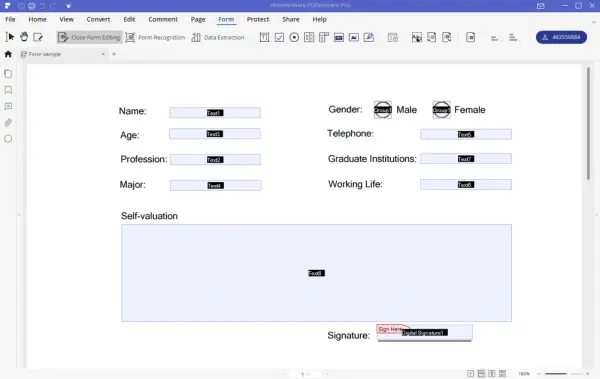
There is also a powerful Forms function which allows you to add fillable forms to your PDF files. The Tools section also contains additional tools for adding watermarks, backgrounds, headers, and footers. All of these functions create the ultimate convenience for almost any type of user.
Moving, rotating, and adding pages
- Click on the Organize Pages button on the right-hand toolbar.
- To move a page, hover over it and while holding your mouse button down, drag it to a new location.
- To add a new page, click on the Insert Blank Page button on the left-hand toolbar.
- To delete a page, click on it and use the Delete Page button on the left-hand toolbar.
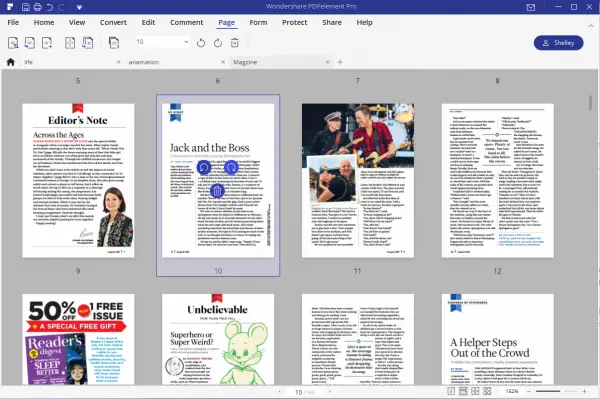
The Insert from File option lets you import pages from other PDF files. To use it, click the Insert from File button on the left-hand menu and select the PDF file that you want to import pages from.
To rotate a page:
- Select the page.
- Click on the Rotate Pages button on the left-hand toolbar.
Extracting pages from a PDF
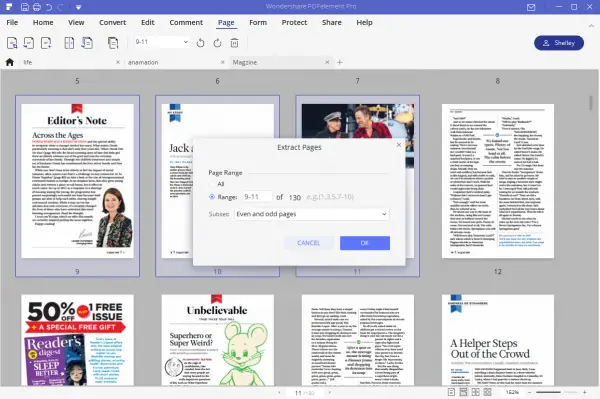
- Select the pages you wish to extract
- Click on the Extract Pages button on the left-hand toolbar.
- Use the Page Range button on the top of the left-hand toolbar to efficiently select the pages.
 Adjoining Pages
PDFelement 7 lets you combine pages into a new PDF, image, or text document. To export a PDF as an image:
- Go back to Page View mode and click on Tool > Batch Process. Alternatively, you can use the app’s main menu (top left of screen) by selecting Tools > Batch Process.
- You will now see the PDF Converter dialogue box. Switch from Format in the dropdown box on the top right corner and select To Image.
- Specify which image format and DPI to use. You can also specify how many images to create (one large image with all pages or separate images for each page).
- To choose a page range, open the Options dialogue box by clicking the button with three straight horizontal lines (located to the left of the Apply button).
I found working with pages in PDFelement incredibly easy because you can use the page thumbnails to effortlessly switch between pages, move them, and edit them.
2. Adobe Acrobat
Adobe is well-known as one of the world’s largest software companies and the creator of the PDF file format. Adobe Acrobat is a professional and widely-used PDF editing tool that is fairly simple, yet also boasts some very powerful features.
How to edit a PDF document with Adobe Acrobat
To get started, download a trial of Adobe Acrobat from acrobat.adobe.com. Once you have installed and opened the app, open the PDF file you wish to edit by clicking Select a File and choosing your file. Alternately, you can drag and drop a file into the app or select File > Open.
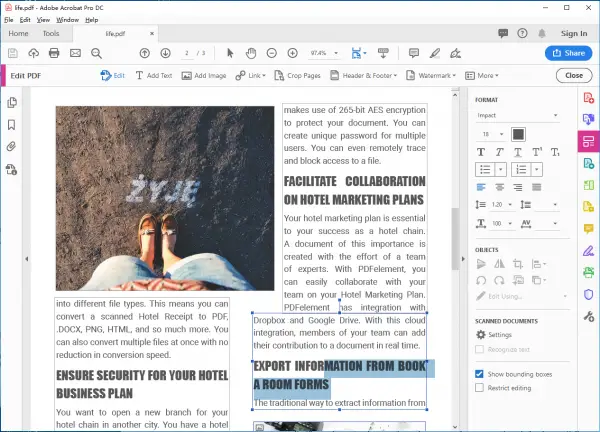
Edit or add text to a PDF using Adobe Acrobat
- Open the file you want to edit
- Select Tools > Edit PDF > Edit, then select the text you wish to edit.
- Begin typing to replace the text or press Delete to completely remove it.
- Change the text’s color, size, font, and more using the options in the right-hand pane. Bullet lists can also be added using the Format
Adding a new text box:
- Select Tools > Edit PDF > Add Text
- Drag the mouse to set the width of the new text block and click on the area to insert it.
- Add your text and use the text formatting options mentioned earlier.
- Once you have finished adding or editing your text, remember to save your PDF!
Similar to working with PDFelement, Adobe Acrobat makes it easy and straightforward to work with text. The functionality is similar and should be accessible for even beginner users.
Editing images in a PDF
- Open your PDF file and select Tools > Edit PDF > Add image
- Use the dialogue box to select the image that you want to insert.
- Once you have opened your image, click on the area where you want to insert it.
- After insertion, you can move and re-size the image by dragging one of the handles surrounding the image, or clicking on it and dragging it to a new area.
Working with images, I found to be easy, straightforward, and did not cause too much hassle in Acrobat.
3. Nitro Pro
Nitro is another powerful PDF productivity tool that makes editing, converting, scanning, and eSigning PDF files incredibly simple, even for the most novice of users.
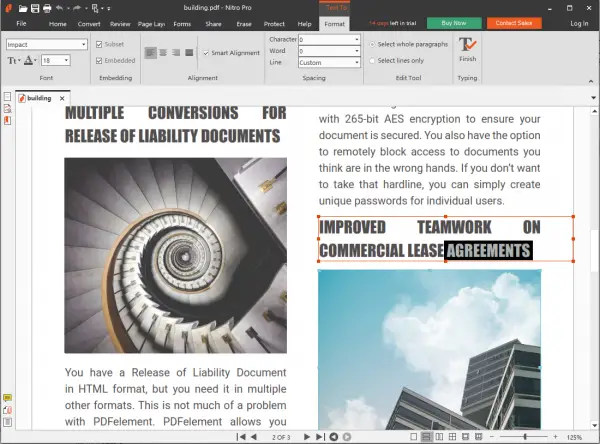
How to edit a PDF document with Nitro
To get started, download the trial of Nitro from gonitro.com. Double click on the downloaded file and follow the instructions to install it. Once you have installed Nitro, open your PDF file by selecting File > Open and navigating to the file.
Add or edit text box in a PDF using Nitro Pro
- Select Tools > Type Text
- Click on an area within your PDF where you would like to insert a new text box.
- Once you’ve placed the text box, start typing.
- Use the format tab to set text options, including alignment, font size, font family, and font style. Once completed, press Escape or click Finish.
Edit existing text:
- Click the Edit button located on the left-hand side of the ribbon
- Double click the text you wish to edit and place the cursor directly where you want to edit or insert additional text.
I found the text function simple and intuitive, though a bit less so than PDFelement. It wasn’t overly complex but could have been a bit smoother.
Add or edit images in a PDF
- Open your PDF and in the Review Tools group, click Add Image.
- You can add an image from 3 sources: from a file, from the clipboard, or a scanner. Choose your desired option, and the image will automatically be inserted on the page.
- Click on the image to move it to the correct position or resize it. Clicking the elevated handle will let you visually rotate the image as well.
Nitro Pro also has some excellent image editing features available
- Click Edit and double click on the image you wish to modify.
- Go to the Format tab and navigate to the Arrange group to bring images to the front or back, flip images, rotate them, and more.
Adjusting the size of images is done in the Size and Positions group. In this group, you can crop, adjust the height or width of, scale, reposition, and rotate images. Again, this was easy to use, and I really like that you can add images from multiple different sources.
4. Foxit Phantom
Foxit Phantom is a professional PDF solution designed to cater to the needs of both business and personal users. It has powerful PDF conversion and editing tools, along with a useful OCR feature.
How to edit PDF file with Foxit Phantom
Start by downloading a free trial of Foxit Phantom from their website. Once you have downloaded the installation file, double click on it and follow the instructions to install it on your computer.
Add or edit text
- Open the PDF file in Foxit Phantom and click on the Edit Text button at the top of the screen.
- Click on the text area you wish to edit and start typing your new text.
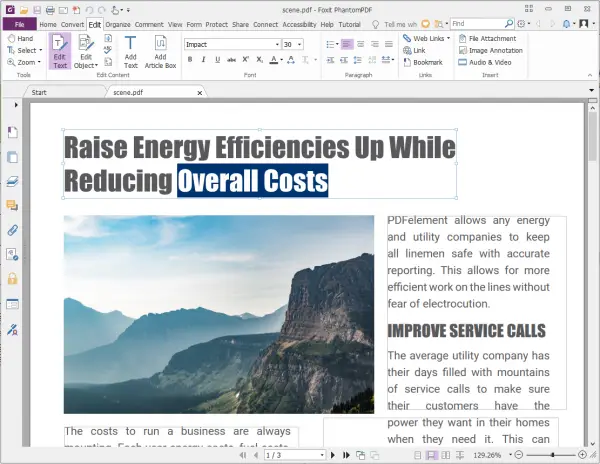
To add a new text section:
- select Edit > Edit Content > Add Text Tool.
- Start typing or paste the text into your new text box.
- Hit the delete key to completely remove a section of text
- Use the formatting options available, including font size, font family, and alignment.
I found the text process took me a little bit longer with Foxit. It wasn’t quite as simple as other programs, but still does the trick and is not overly complex.
Add or edit images
- Select Edit > Edit Content > Add Images > New Image Object.
- In the Add New Image dialogue box, set the parameters for your new image box and click ok.
- The Image Editor will then appear. Use this window to draw an image from scratch or paste an image from the clipboard.
- Once you are happy with the image, insert it into your PDF file.
I found this tool didn’t have quite as many straightforward image editing options, but it was still a decent tool for moving and modifying images.
5. Nuance
Nuance offers a wide range of business, finance, and productivity tools. Their PDF editing suite, called Nuance Power PDF, makes it simple to edit PDFs using an intuitive user interface, which I found quite straightforward and easy to use.
How to edit PDF file with Nuance
Start by downloading a free 30-day trial from the Nuance Website. Once you have installed the application, open the PDF file you wish to edit.
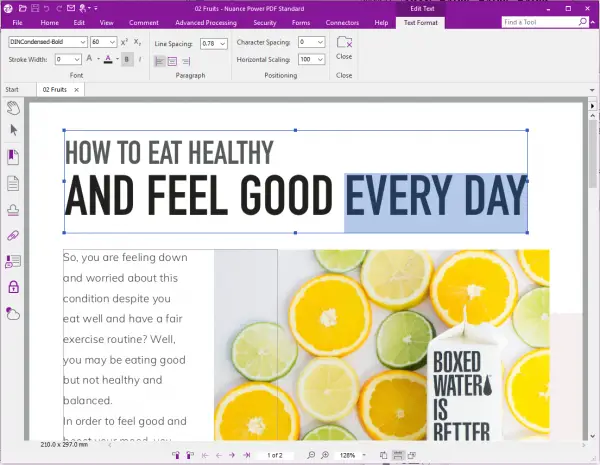
Edit text in a PDF using Nuance
- Select Edit > Modify > Edit Object. (or right click and select Edit Text and Images).
- Click on the text that you wish to edit.
- Use your mouse to highlight the words you wish to edit or remove and make the necessary changes.
- Use the options box on the right-hand side to change text options.
Edit images in a PDF using Nuance
- Select Edit > Modify > Edit Object
- Use the drag handles surrounding the image to resize it. Move it by hovering over the center of the image and holding down the mouse button.
- Use the Object Tools tab options to flip, rotate, group, and arrange images.
I like the broad range of features offered by this program, though I found they took me a little bit more time to figure out and weren’t quite as intuitive as other programs.
Conclusion
As you can see, there are several fantastic options available for editing PDF files. All of the tools listed above are very powerful. However, I recommend PDFelement, because it offers all of the advanced features of more expensive programs, but using a much simpler and user-friendly interface. You can get up to 50% off for a limited time if you decide to have it.
Leave a Reply