Screen Recording is becoming an essential activity these days. Everyone wants to make a video in their work that includes video tutorials, game recording, training videos, create professional courses, presentation videos, and more. Doing all this needs a recorder and an editor. During recording, there will be mistakes, and all those need to be removed. Users will also need to remove them and add a professional touch to the final video. That’s where you need an editor. That’s is where you need tools like Wondershare DemoCreator– the all-in-one screen recorder and editor for PC.
Wondershare DemoCreator Review
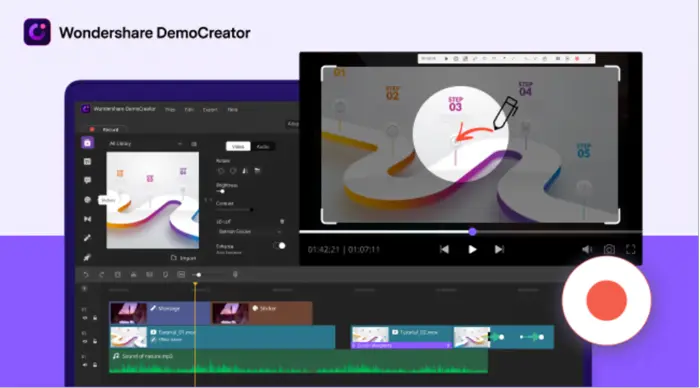
Wondershare DemoCreator is an all-in-one screen recorder for PC. It is also a video editor. When you first install it, it only offers a minimal screen with the option to start a new recording, open the video editor, and list of recording and video editing projects. To start recording, click on New Recording, and you will opt to select an area to start recording and use F10 to start and stop recording.
What is very intuitive about the software is that it’s not a plain recording software like others. It offers features like Screen Drawing and Spotlight to bring creativity during recording. Both of them can be quickly used with keyboard shortcuts, which are useful to keep the mouse in focus.
Screen recorder and video editor software
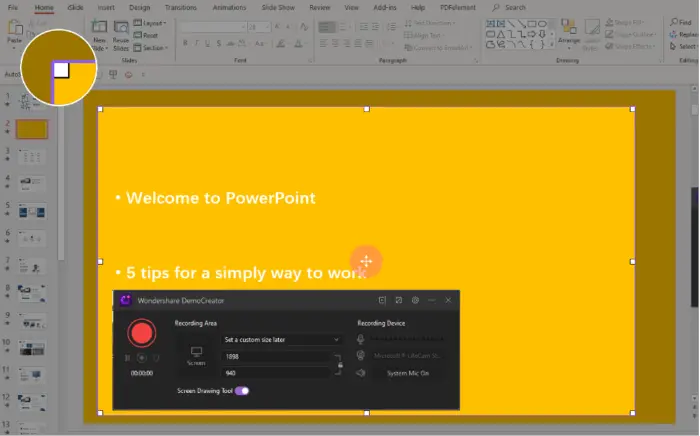
The software also offers fully configurable settings such as capturing system sound, microphone recording, including webcam and setting the resolution before recording. If you need to use the Screen drawing tool, make sure to toggle it before recording.
Next comes the video editor, and it’s impressive that Wondershare DemoCreator has included a full-fledged editor, which is not common for other screen recording tools. It offers a non-linear timeline where you can get three videos on top of each other. Along with regular editing features, i.e., cut, copy, paste, the video’s speed can be changed, the volume can be leveled, and more. It also supports borders, effects, animation effects, text, and overlays.
If you use Green Screen, you can also replace the background, use Cinema resolution, and Mosaic effect.
Key Features of DemoCreator
Here is the list of some of the prominent features of DemoCreator that sums up all the features.
- Real-time screen drawing that can be brought up using a keyboard shortcut
- Mouse spotlight to highlight so everyone can follow the direction
- Record system sound, microphone, or webcam synchronously, which is especially handy for game streaming
- Audio fade in and fade out
- Fast export without editing can save a lot of time
- Powerful annotation tool
- Green Screen Effects to change the background and match it with the theme.
- Transition Effects, Stickers, and Caption Tools to create professional-looking videos.
How to record videos using DemoCreator
Step 1:
Launch the DemoCreator app, and then click on New Recording. Next, select the Recording Area, which can be full screen, select a region or an application window. The last one is useful if you record a custom application and want it to be the only focus. If you use the drawing tool in real-time, make sure to toggle on the Screen Drawing Tool option. The final step is to select the microphone, webcam, and system microphone selection before you start recording.
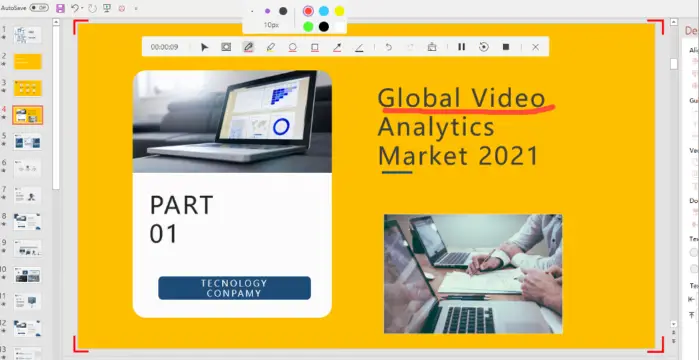
Step 2: Click on the Record button, and the drawing tool will instantly show up on top of the recording area. You can use pens, arrows, lines, cleanup, undo, redo, and other tools to draw on. It is specifically useful when you have a whiteboard.
Along with this, you also have the mouse spotlight feature. It is useful if you want to focus on some particular to draw the attention of the viewer. Click on the square looking icon with a circle in the middle. Then to enable spotlight, left-click on the mouse and hold it.
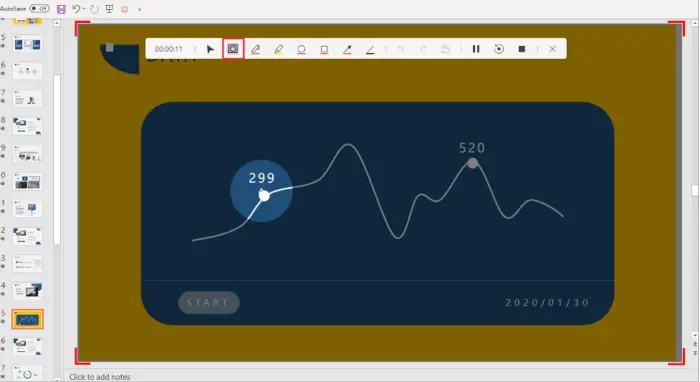
You also get a one-click pause, one-click delete, restart and stop button on the drawing toolbar. There is also a bookmark button next to the delete and record button, reminding you during the video editing.
Step 3: The last step is to decide if you want to pause, delete, or clearly understand if you are ready to edit the videos. Press the stop button, and the video will open in the built-in video editor.
How to edit recorded video
A built-in video editor that offers a full-fledged set of features, so you don’t need another editor, is a big plus. On top of that, it comes with features you can use to enhance the final output. You can also use it to edit any video from the computer, and not just the recording.
Key Features of Video Editor
- Non-linear timeline allows you to stack video, audio, and effects on top of each other.
- Export video without any edit, which bypasses the rendering engine and saves a lot of time.
- Add text overlays, annotations, stickers, transitions, effects, and cursor highlights.
- Supports markers, audio voice over, zoom to fit the timeline, screenshot, and so on.
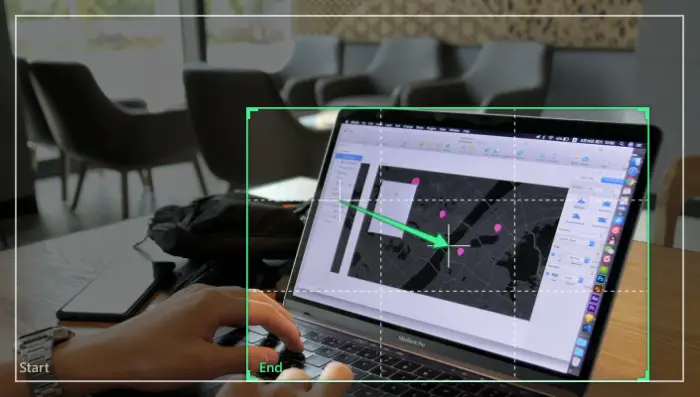
- Zoom & Pan: While editing some micro-level details of the video, zoom in, and zoom out is very much essential. You can find this functionality along with the option to pan left or pan right of your video clip.
 Steps to edit videos with DemoCreator
Here is how to edit the videos using the video editing software.
Step 1: Drag and Drop the video on the timeline. If you have more, you can drag and arrange it on top of each other. If you have audio to sync, make sure you add that, and you can also right-click to detach audio from the video. Now that you are ready, let’s move to the next step.
Step 2: Here, you can choose to edit the video and audio. Right-click on any of them, and you will have all the edit options. It will also reveal the keyboard shortcut, which will make the editing a lot faster.
Step 3: Once everything is set, it’s time to enhance the video by adding different effects.
Audio fade-in and fade-out: This feature allows you to smoothen audio in and out. If there is a section in the audio where it changes suddenly or the volume pitch is high, you can use this. You can also be used with background music.
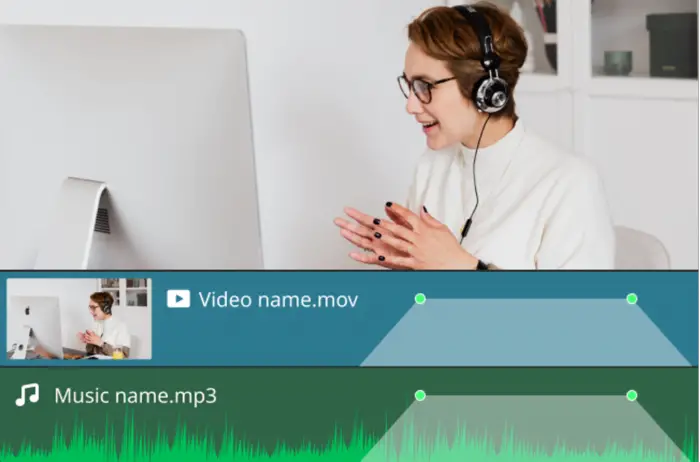
Right-click on the audio file and select edit audio. Now when you move your mouse over the audio level, the icon will change, and then you can drag to the right to created fade in. In simple words, it makes sure the voice increases slowly. Similarly, if you do this to the other end of the audio file, you can drag it to the left to create the fade out.
Add cursor effects
While the spotlight is already available during recording, if you wish to add some extra effects, you can use the Cursor effect to create the highlight. Drag and drop the effect at the timeline of where the cursor is. If there is any mouse movement, it will add a cursor effect.
On similar lines, you can switch to other functions such as stickers, annotation, green screen, captions, transitions.
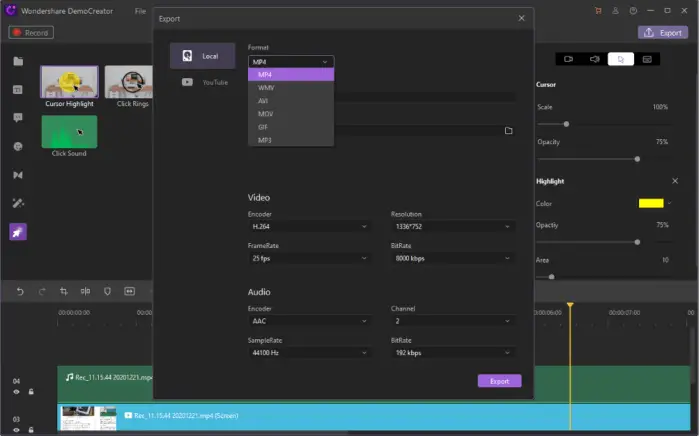
Step 4: Finally, it’s time to export the video. Click on the Export menu. You will have two options—Local or YouTube. Under the Local option, you can choose encoder, frame rate, bit rate, sample rate, and so on for both audio and video. When it comes to YouTube, you can connect your account and then upload it with title, tags, quality, category, and privacy options.
Conclusion
Wondershare DemoCreator is not just an excellent screen recorder and video editor. It is also a professional video creator tool. It is perfect for those who want to create tutorial videos, streaming videos, and webcam support. Along with this, you also get effects tools such as text, annotations, effects, and more.
Wondershare DemoCreator - 23.99$/year
-
Video/Audio Editing Quality - 90%
90%
-
Functionality & UI - 90%
90%
-
Batch Processing - 92%
92%
-
Editing Options - 95%
95%